


I brought a book on making Japanese decoration cake roll. The book is in Japanese. And there is a tiny problem… I don’t read Japanese.
I was fully aware that the book is in Japanese when I brought it. I was flipping through the pages in the bookstore, feeling frustrated that I don’t understand a single word. I got it anyway, with a crazy optimism that I will suddenly be able to read Japanese by the time I got home.
Hmm… Maybe not!
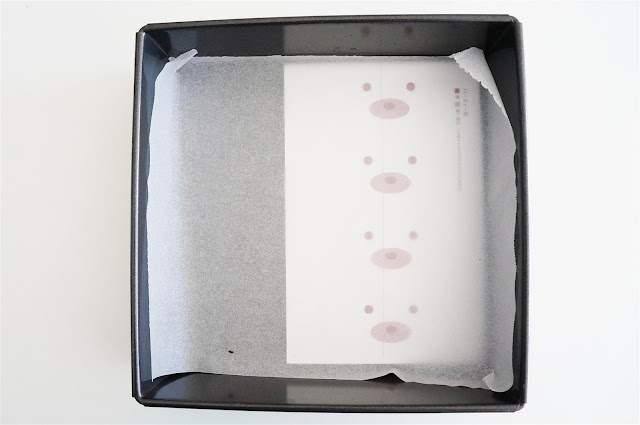
Fortunately, there is a step-by-step picture instruction of making the basic decoration cake roll at the back of the book. I also visited the author’s blog (also in Japanese) where she has posted the recipe for one of her decoration cake roll. A quick google translate is enough for me to fill in the blanks. But oh boy, it took me a very long time to interpret and write out this recipe.
Since Easter is just around the corner, I thought I will make a bunny cake roll, which also happens to be the easiest to make compared to all the other decoration cake rolls in the book.
This cake roll not only looks cute, but also the best tasting cake roll that I have made. It is cottony soft, light and melts in my mouth. So if you are not too keen on making the pattern, it’s worthwhile just to make the cake roll.
So there you go, with much hard work and perseverance, the recipe below is my interpretation of making the kawaii bunny deco cake roll. You are welcome.


Bunny Deco Cake Roll
(Adapted from Roll Cake by Junko)
For the roll sponge
Part A- egg yolk mixture:
3 egg yolks
30 grams caster sugar
60ml milk
1 teaspoon vanilla extract
40ml vegetable oil
80 grams cake flour
Part B- meringue:
3 egg whites
30 grams caster sugar
1 teaspoon cornstarch
For the eyes, nose and snout
1 egg white
1/4 teaspoon cake flour
black food colouring
brown food colouring
For the sugar syrup
10 grams caster sugar
20ml hot water
For the filling
150ml whipping cream, chilled (Note: do not use low fat cream.)
18 grams caster sugar
1/2 teaspoon vanilla extract
Fresh fruits of your choice (I used mango)
For the ears
White chocolate (I used Nestle White Chocolate Melts)
Pink food colouring
To make Part A- egg yolk mixture:
Preheat the oven to 170 degrees celsius (or 150 degrees celsius fan-forced). Grease and line a 28cm x 28cm flat square cake pan with baking paper.
Using an electric mixer, beat egg yolks and sugar on medium-high speed until pale and creamy.
Combine milk, vanilla extract and oil in a small bowl. Add to beaten egg yolk mixture and whisk at low speed until just combined. Sift flour over egg mixture, and whisk at low speed until smooth and well-combined.
To make eyes, nose and snout:
Clean and dry the whisk thoroughly, and in a clean bowl, whisk the egg whites until stiff peaks form.
For the eyes and nose:
Scoop out 1/2 tablespoon egg yolk mixture from Part A into a small bowl. Stir in black food colouring. Stir in 1 tablespoon of whisked egg whites until well-combined.
For the snout (brown part of the nose):
Scoop out 1 tablespoon egg yolk mixture from Part A into a small bowl. Stir in 1/4 teaspoon of cake flour. Stir in brown food colouring. Stir in 2 tablespoons of whisked egg whites until well-combined.
On the prepared cake pan, pipe eyes and nose. Bake for 1 minute. Remove from oven.
Pipe snout over nose. Bake for 1 minute. Remove from oven.
(Note: reserve leftover whisked egg whites for Part B.)
To make Part B- meringue:
Combine sugar and cornstarch.
Clean and dry the whisk thoroughly, and in a clean bowl, whisk the egg whites until foamy. Add half the sugar-cornstarch mixture and continue beating for a few minutes, then add remaining sugar-cornstarch mixture and beat until egg whites are glossy and stiff peak form.
Add one-third of meringue into egg yolk mixture from Part A. Fold in lightly with a spatula to loosen the mixture a little. Then add the rest of the meringue (including leftover whisked egg whites from making the eyes and nose) and fold to incorporate completely.
Pour batter into the prepared pan over the "eyes and nose", spreading the mixture evenly and smoothing the top with a spatula. Lightly tap the bottom of the tray on the work surface.
Bake for 14 minutes until the cake has risen slightly and feels springy to the touch. Remove from oven. Turn sponge straight from oven onto a sheet of baking paper. Peel off baking paper from the bottom of the sponge. Cover with baking paper, then a damp tea towel. Set aside to cool completely.
To make sugar syrup
Dissolve sugar in hot water. Set aside to cool.
To make filling:
Combine cream, sugar and vanilla extract in a clean bowl. Place bowl over a larger bowl filled with ice cubes and water. Using an electric mixer, whip cream at medium speed until stiff peaks form but cream is still smooth.
To make bunny ears:
Melt white chocolate as directed on package. Place 1 tablespoon of melted white candy into a small bowl and tint pink. Place both white and pink candy into seperate ziplock bag. Snip off small tip from one corner of each bag. Draw 8 bunny ears (plus a couple spares) on baking paper with melted chocolate. Fill in middle of white ears with pink chocolate. Allow to set at room temperature.
To assemble:
When the cake is completely cool, make shallow cuts along the cake, 2 cm apart, in the crust on top of the cake with a small sharp knife. Brush sugar syrup over the cake, followed by the whipped cream and fresh fruits. Roll up the cake around the filling. Wrap the cake in fresh clingfilm and refrigerate for at least 1 hour. Decorate with rabbit ears.
Must be scrumptious, last mangos for the season...
ReplyDeletewow .
ReplyDeletethat sure seems like a lot of hard work but hte bunnies look extremely cute!
Shobha
So cute! Just awesome;-)
ReplyDeleteHow adorable! Nomm... And who doesn't like a perfectly ripe mango inside of a cake.
ReplyDeletehow precious! Almost too cute to eat. (◡‿◡)
ReplyDeleteI was wondering where I would find patterns for something like this outside of Japan, I have been searching the web for them and I can't find any templates and I am not skilled enough to make something like this freehand.
ReplyDeleteHi Katy. The patterns, unfortunately, come with the book. However, I don't see why we can't get creative and perhaps use gift wrapping paper with the patterns that you like and use it as a template. I have done that once before and it came out great.
DeleteWhat a cute bunny cake! Almost too cute to eat! And you, so brave, buying a cookbook in Japanese!
ReplyDeleteJust wondering - isn't 1 egg white & only 1/4 tsp cake flour too liquid for the snout, etc?
ReplyDeleteSherry
Hi Sherry. If you read the recipe, you will notice that two tablespoon of the beaten egg white and the 1/4 tsp cake flour are to be added to 1 tablespoon of the egg yolk mixture. Please refer to the "To make eyes, nose and snout" and under the "For the snout (brown part of the nose):" for further description of the method.
DeleteHi im tryin to bake the pattern but it still wont stick to the cake..im using parchment paper..can u help me to solve it...thanks
DeleteHi Zoya. I never had any problem with having the pattern not sticking to the cake. It seems rather unusual. Did you baked the pattern for a minute first, and then immediately pouring the cake batter directly over the pattern? Or maybe you overbaked the pattern?
DeleteThank you so much for shared!
ReplyDeleteYou are seriously a legend, I tried translating this recipe myself, got confused and gave up. Thanks so much for giving me a chance to try it out! :)
ReplyDelete