Cakes

9.26.2016
Peach and Cream Syrup Cake

I have a lot of cake tins. I can't help but impulse buy when I saw something that I don’t already have. I got to have it, I said. I would need it in the very near future and who knows it might not be available then, I debated. I would be wishing that I brought it in the first place and I would be full of regrets forever, I reasoned.
So it's no surprise that I got a kugelhopf/ bundt tin. To be fair, I have every intention of making kugelhopf. But when I saw this interesting peach and cream syrup cake recipe, my kugelhopf tin was screaming to me. I could visualise the beautiful pattern imprinted on the cake. It would be beautiful with nothing else.
This peach and cream syrup cake has a wonderful tender crumb, almost fudgy even. With the peach syrup that absorbs into the cake, you know it's going to be good. You might think that it will be too sweet like most syrup cakes, but it's not. And the cream! Please whatever you do, don't skip the cream. The cream adds a wonderful lightness and creamy component to the cake. And it's a peach and cream cake afterall.


Peach and Cream Syrup Cake
(Adapted from Delicious Magazine Australia October 2016)
Peach Cake
700 grams canned peaches in syrup (400 gram drained weight)
200 grams unsalted butter, room temperature, softened
200 grams caster sugar
1 teaspoon vanilla bean paste
4 eggs
200 grams almond meal
225 grams plain flour
1 1/2 teaspoon baking powder
1/2 teaspoon bicarbonate of soda
250 ml buttermilk
Additional melted butter and flour for greasing
Peach Syrup
300 grams reserved peach juices/syrup from cans
50 grams caster sugar
1 teaspoon vanilla bean paste
Vanilla Cream
300 grams thickened cream
1 teaspoon vanilla bean paste
To make peach cake:
Preheat oven to 180C conventional (or 160C fan forced).
Brush 26cm bundt pan generously with melted butter, dust buttered pan with flour, shake and tap the pan over the sink to remove excess flour. (Note: Don't be tempted to skip this step even if you have a non-stick bundt cake pan.)
Drain peaches, reserving syrup. Whiz the peaches in a food processor to a smooth puree. Set aside.
Using a stand mixer, beat butter, sugar and vanilla until thick and pale. Add eggs, 1 at a time, beating well after each addition. Combine the almond meal, flour, baking powder and bicarbonate of soda in a bowl. With the motor running on low speed, add dry ingredients and buttermilk in 2 batches until just combined. Stir through peach puree until well combined. Spoon mixture into the prepared pan, smoothing the surface with a spoon. Bake for 1 hour 15 minutes or until a skewer inserted into the centre comes out clean.
While the cake is still hot, poke a few holes in the cake with a toothpick, and pour two third of the hot peach syrup over the cake (see steps below on how to make the peach syrup). With the cake still in the pan, set aside to allow the syrup to absorb completely, about 10 minutes. Invert cake onto a wire rack set over a baking tray, drizzle remainder of the peach syrup over cake, and allow cake to cool completely.
To make peach syrup:
Combine reserve peach juices/syrup, sugar and vanilla in a small saucepan over medium heat, stirring until sugar dissolves. Simmer for 5 minutes or until slightly thickened.
To make vanilla cream:
Whip cream and vanilla until soft peak.
Serve cake with vanilla cream and a couple of peach slices.

7.18.2015
Raspberry, Lychee and Vanilla Cake


Who knew raspberry and lychee can be so good together! They certainly don't sound all that impressive on paper. But OMG! I had an OMG moment when I tried it the first time. Like OMG, why didn't I try this earlier? In a way, I think, I love these flavours together because they reminiscent of spring, and romance, and girly tea parties. And maybe also for the simple reason that I love raspberry and lychee.
I want to make a delicate cake to go with these flavours. A chiffon-like cake that is light and fluffy, but sturdy enough to be baked in a standard cake pan. And billowy swiss meringue buttercream two ways; raspberry buttercream for the filling, and vanilla buttercream to dress the cake like a dream. And of course plenty of lychee in the raspberry buttercream filling, and lychee sugar syrup to amp up the flavour. To make this cake extra special, I decorate it with pink macarons on the side to give it a wow factor, and pile on a generous amount of raspberries on top of the cake that sit so enticingly like red rubies.
I have to say. This is the prettiest cake I have made to-date. And I am so excited to share it here on this blog.


Raspberry, Lychee and Vanilla Cake
Makes an 8" cake
Sponge
4 egg yolks, room temperature
40 grams caster sugar
80ml milk, room temperature
60ml neutral flavoured oil (I used rice bran oil. You can also use veg oil, corn oil, etc.)
1 teaspoon vanilla extract
135 grams cake flour (Or plain flour. But cake flour gives a softer texture cake.)
1 teaspoon baking powder
6 egg whites, room temperature
40 grams caster sugar
Lychee Sugar Syrup
1 can (560 grams) lychee in syrup
50 grams caster sugar
Raspberry and Vanilla Buttercream
250 grams fresh or frozen raspberries
2 tablepoons caster sugar
4 large egg whites (about 80 grams)
200 grams caster sugar (I used vanilla caster sugar)
350 grams unsalted butter, soften, cut into small cubes
120ml milk, room temperature
1 teaspoon vanilla extract
You will also need 250 grams fresh raspberries and macarons to decorate. Recipe for macarons here.
To make sponge:
Preheat oven to 180 degrees celcius conventional (or 160 degrees celcius fan-forced).
Using an electric stand mixer, whisk egg yolks with 40 grams sugar until very pale and creamy.
Combine milk, oil and vanilla extract in a bowl, with mixer at low speed, add to egg yolk mixture until combines.
Combine cake flour and baking powder in a bowl, with mixer still at low speed, add to egg yolk mixture until combines. Set aside.
Using an electric stand mixer, with a separate clean dry bowl and whisk, whisk egg whites until foamy. Gradually add in the remaining 40 grams sugar and whisk until stiff peaks form.
Using a spatula, take 1/3 of the stiff egg whites and fold into the yolk batter. Fold in the rest of the whites.
Divide batter into 2 x 8" cake pans. (Note: I didn't grease or line the cake pans. However, I did use non-stick cake pans with removable base. Line your cake pans if you wish, especially if your cake pans do not have a removable base.)
Bake in the preheated oven for 25 minutes or until an inserted skewer comes out clean. Remove from oven, turn cake pans upside down on a cooling rack and allow cakes to cool completely in pans.
Once cakes are completely cool, trim cakes to your preference.
To make lychee sugar syrup:
Strained syrup from a can of lychee. Reserve lychees for the filling.
Combine 125ml lychee syrup and sugar in saucepan, stir, over medium heat until sugar dissolves. Allow to boil for 5 seconds. Set aside to cool completely.
To make raspberry and vanilla buttercream:
Combine raspberries and 2 tablespoons sugar in a saucepan, cook over medium heat until raspberries break down and release its juice. Continue to cook, stirring constainly, until juice thickens slightly and coats the back of a spoon.
Strain the raspberry mixture through a sieve into a bowl, pressing down with the back of a spoon and discarding the solids. Allow the raspberry mixture to cool completely before incoporating into buttercream.
Meanwhile, combine the egg whites and caster sugar in a heatproof bowl set over a pan of barely simmering water and whisk continuously by hand until the egg white mixture reaches 70°C on a sugar thermometer. (You can make this icing without a sugar thermometer. Simply whisk until the sugar is dissolved (about 8-10 minutes). Test by rubbing a small amount between your fingertips; it should feel completely smooth, without sugar grains.)
When the sugar has dissolved and the syrup is warm to the touch, remove the bowl from the pan. Using an electric mixer, whisk for about 10 minutes until stiff peaks form and the mixture has cooled (checked by touching the bottom of the bowl). The meringue needs to be completely cooled before you add the butter.
Start adding small lumps of the softened butter a little at a time, whisking well after each addition and scraping down the bowl from time to time. The icing may appear to curdle and split as you add the butter, but keep going and it will come back together again. Gradually add the milk and vanilla extract until everything is well incorporated, and the vanilla buttercream is smooth.
To make raspberry buttercream, scoop out 1/3 of the vanilla buttercream in a seperate bowl. Add cooled raspberry mixture into the 1/3 buttercream and whisk until everything is well incorporated.
To assemble:
Brush lychee sugar syrup on one side of a cake layer. Pipe over raspberry buttercream, then top generously with lychees. Brush lychee sugar syrup over second cake layer. Place cake layer, syrup side down, on top of buttercream. Brush lychee sugar syrup on top of cake layer. Cover cake with the vanilla buttercream. Decorate with macarons and raspberry. Note: To ensure that the macarons stick to the side of the cake, pipe or spread some buttercream on the macarons and press it gently onto the cake.
This cake is best served at room temperature. Take the cake out of the fridge for 10 minutes before serving on a hot day, or 20 minutes on a cold day to allow the buttercream to soften.

11.02.2014
Very Good Carrot Cake

I have not abandoned this blog… if anyone was wondering.
It’s quiet here because I’m suffering from blogger’s block; zero inspiration, and unsuccessful and equally un-photogenic bakes. In another words, I was baking uninspiring crap that looked shit which I blame it on a poor excuse that I made up.
The other reason is I got myself a full-time job. Yay for me. Not so yay for this blog. I do hope, however, I will be able to start baking more often once I get into a routine. For now though, I’m feeling too tired after work to do anything, let alone bake.
Anyway, when I do get around posting something here on this blog, I promise it will be good. You know, like they say, quality not quantity. Like this very good carrot cake.
There are many recipes and variations out there for the ever popular carrot cake. I tested many many recipes (yes, a double “many”, grammar check), including most of the popular ones online and some of the promising ones in cookbooks and food blogs.
I decided that I like my carrot cake old-fashion. No coconut please, and definitely no pineapple. I’m almost tempted to say I prefer it without walnuts and sultanas. But on second thought, the crunch from the walnuts (if roughly chopped to the right size) and the occasional burst of sweetness from the sultanas add interest to the cake which I quite enjoy. I like my carrot cake moist (of course) but not soggy, with just a hint of cinnamon, and a gentle note of orange.
I can’t say that this is the ultimate carrot cake because I’m sure many will disagree. This is, however, my favourite one of all the carrot cakes that I made. It’s a very good carrot cake which I’m sure won’t disappoint. It’s an easy cake to make too. Mix the ingredients for this cake like you would with muffins- the trick is not to over mix.


Very Good Carrot Cake
(Adapted from Best Recipes)
Makes 8 mini loafs (or a 20cm diameter cake)
Carrot Cake
1 cup self-raising flour
1/2 cup plain flour
1 teaspoon bicarbonate of soda
1/2 teaspoon ground cinnamon
1/2 cup brown sugar
3/4 cup vegetable oil
1/2 cup golden syrup
3 eggs
1 teaspoon vanilla essence
1 tablespoon orange liqueur, e.g. cointreau (optional, but highly recommend for a hint of orange)
2 medium carrots, grated
3/4 cup sultanas
3/4 cup chopped walnuts
Cream Cheese Frosting
120 grams light cream cheese, softened and at room temperature
60 grams butter, softened and at room temperature
1 1/2 cup icing sugar
zest of an orange
To make carrot cake:
Preheat oven to 170C (or 150C fan-forced).
Line and grease mini loaf pan (I used Baker's Secret 8 cup petite loaf pan) or 20cm round cake pan.
Combine flours, bicarbonate of soda and cinnamon into a large bowl. Set aside.
In a seperate bowl, whisk together sugar, oil, golden syrup, eggs, vanilla and liqueur until well combined. Add to flour mixture. Using a spatula, gently fold mixture together until just combined. (Tip: This should take only about 10 folds, making sure to scrap the bottom of the bowl with each fold. There should still be big pockets of flour in the mixture. That is okay because we will get to that when we fold in the rest of the ingredient.)
In a seperate bowl, combine grated carrots, sultanas, and roughly chopped walnuts. Add to mixture above. Using the spatula, gently fold all the ingredient together until just combined. (Tip: The trick is to mix as little as you can get away with, without leaving pockets of flour in the batter. The batter should still be slightly lumpy.)
Spoon our pour mixture into prepared pan. If you are using the petite loaf pan, bake for 20-30minutes or until golden and a skewer inserted into centre of cake comes out clean. For 20cm round cake pan, bake for 1 hour.
Stand in pan for 10 minutes. Turn, top-side up onto a wire rack. Cool completely.
To make cream cheese frosting:
Using an electric mixer, whisk together cream cheese, butter, icing sugar, and orange zest until pale, light and fluffy. Allow frosting to firm up in the fridge for at least 2 hours.
Pipe or spread frosting over top of cake. Decorate with grated carrot.

8.28.2014
Flourless Orange and Almond Cake


I have this recipe for many years, way before gluten-free is “trendy” and few knew what coeliac disease is.
This flourless orange and almond cake remains one of my favourites all these years. It’s wonderfully light and refreshing, and simply melts-in-your-mouth. It doesn’t require many ingredients which is always a bonus. And it’s so easy to make that I’m almost tempted to say that it’s fail-proof. The only downside to this recipe is that it’s time-consuming because you need to simmer the oranges for at least an hour.
Sometimes, I would add a tablespoon of orange liqueur (e.g. Cointreau) to make this cake just that little bit special. For those who like frosting on their cakes, cream cheese frosting with finely grated orange zest will go well with this cake. Today though, I opt for a light brush of warmed orange marmalade over the top of the cake and decorate it with candied orange slices. Of course, this cake will just be as good on its own. Oh, this can be made into cupcakes too, just so you know.
This cake is best serve chilled and a day after it’s made. The flavour and texture of this cake will be so much better after a day or two of rest.


Flourless Orange and Almond Cake
Makes 22cm diameter cake
Flourless Orange and Almond Cake
2 medium size oranges (about 240g each), unpeeled
6 eggs
180 grams (1 cup) caster sugar
250 grams (2 1/2 cups) almond meal
1 teaspoon baking powder
2 tablespoons orange marmalade (optional)
To make cake:
Place whole unpeeled oranges in saucepan, cover with cold water, and bring to the boil. Once the water starts to boil, drain water, cover oranges with fresh water, bring to the boil, then reduce heat and simmer for 1 hour or until the oranges are soft. Remove oranges and allow to cool. Discard cooking liquid.
Once the oranges are completely cooled, preheat oven to 180C conventional (or 160C fan-forced). Line base and side of a 22cm diameter round cake tin with baking paper.
Trim and discard ends from oranges, quarter the oranges, then remove any seeds. Process oranges in a food processor until smooth.
Whisk eggs and sugar in bowl of electric mixer, on high speed, until thick and pale in colour. Reduce speed of mixer, gradually add orange puree, pouring it down the side of the bowl so not to deflate the eggs mixture, until just combined. Add mixture of almond meal and baking powder in 3 batches, along the side of the bowl, whisk until well combined. Pour mixture into prepared tin.
Bake for 1 hour or until a skewer inserted into centre comes out clean. Allow cake to cool completely in cake tin, then refrigerate, preferably overnight. Before serving, warm orange marmalade in the microwave for one minute, brush marmalade over cake. Top with candied orange slices.
Candied Orange Slices
1 medium size orange, thinly sliced
250 grams caster sugar
300ml water
To make candied orange slices:
Place orange slices in a small saucepan, cover with cold water, and bring to the boil. Once the water starts to boil, drain and discard liquid.
Combine sugar and 300ml water in a saucepan, bring to boil. Once the sugar is completely dissolve and the syrup starts to boil, reduce heat to the lowest possible heat with just barely a bubble breaking the surface. Return the drained orange slices to the barely simmering sugar syrup, cook for about 1 hour or until the zest is transparent and glossy. Cool in the syrup before using, or refrigerate (with the orange slices still in the syrup) until ready to use.


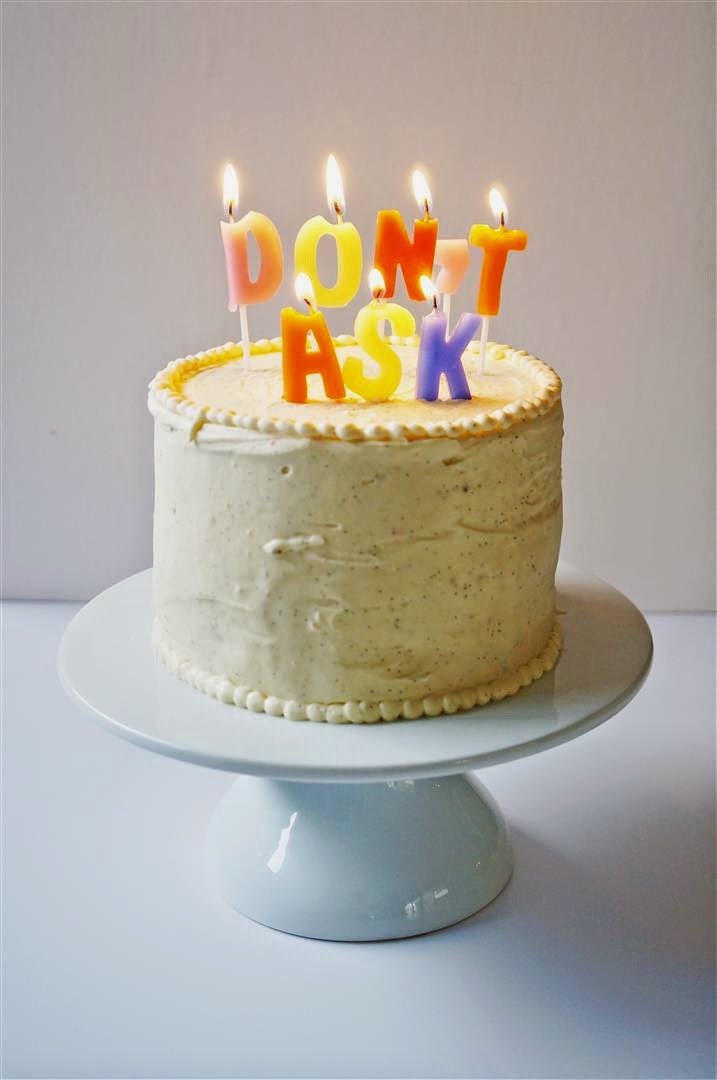
It’s my birthday today. If you know me, you probably know how I feel about birthdays. If not, the candles will give you a clue.
I baked myself a birthday cake. Like I did the last couple of years. And just like every year, I made a strawberry cake because it's my favourite. This year, it's a Japanese-style strawberry shortcake (the best one yet).
It’s a simple cake of chiffon-like sponge layers that are so light and soft and melts away in your mouth like candy floss, and mascarpone cream that is light-as-cloud with specks of vanilla seeds. Of course, it can’t be strawberry cake without fresh strawberries. And homemade strawberry jam added too for good measure. To make this extra special, because it’s my birthday cake afterall, I made the sponge layers in different shade of pink.
I have done several variation of strawberry cakes on this blog; the Japanese-style strawberry shortcake (version 1), the strawberry and cream genoise cake, and the strawberry cloud cake. All delicious and different in their own way. However this one, I dare say, is the best one yet. (Did I say that already?)



Japanese-style Strawberry Ombre Shortcake
Makes one 12cm diameter cake
Sponge cake
Note: Recipe for the sponge cake makes only 1 number of 28cm x 28cm square sponge layer. Repeat 2 more times to achieve a 3 layer cake. I find that it’s easier to bake each layer separately. To get a neater finish, I bake the cake in a 28cm x 28cm square cake tin, and then cut rounds with a cookie cutter. The biggest cookie cutter that I have around the house is a 12cm diameter round cutter, hence a 12cm cake. You can obviously make a bigger cake if you have a bigger cookie cutter.
3 egg whites
30 grams caster sugar
1 teaspoon cornstarch
3 egg yolks
30 grams caster sugar
60ml milk
1 teaspoon vanilla extract
40ml vegetable oil
80 grams cake flour
pink food colouring
To make sponge layer:
Preheat the oven to 170 degrees celsius (or 150 degrees celsius fan-forced). Grease and line a 28cm x 28cm flat square cake pan with baking paper.
Using an electric mixer, whisk egg whites, 30 grams caster sugar and cornstarch until egg whites are glossy and stiff peaks form.
In a separate bowl, whisk egg yolks and 30 grams sugar until pale and thick. Combine milk, vanilla extract and oil in a small bowl, add to beaten egg yolk mixture, whisk at low speed until combined. Sift flour over egg mixture, and whisk at low speed until smooth and well-combined. Stir in pink food colouring until you get the desired shade.
Add one-third of meringue into egg yolk mixture and fold in lightly using a spatula. Add remaining meringue and gently fold to incorporate completely.
Pour batter into the prepared tin, bake for 20-25minutes, or until the cake has risen and feels springy to the touch. Remove from oven. Turn sponge straight from oven onto a sheet of baking paper. Peel off baking paper from the bottom of the sponge. Cover with baking paper, then a tea towel. Set aside to cool completely.
Cut round from the cake sponge using a 12cm diameter cookie cutter, or the biggest cutter that you got around the house.
Repeat all of above 2 more times to get a 3 layer cake.
Strawberry Jam
200 grams strawberries
100 grams caster sugar
1 tablespoon lemon juice
To make strawberry jam:
Puree strawberries in a food processor. Add strawberry puree, sugar and lemon juice in a small saucepan, bring to boil and reduce to a simmer for 5 minutes. Strain the jam through a sieve into a bowl, pressing down with the back of a spoon and discarding the solids. Refrigerate until ready to use.
Sugar Syrup
150ml water
100 grams caster sugar
2 tablespoons of orange liqueur (cointreau)
To make sugar syrup:
Combine water and sugar in saucepan, stir, over medium heat until sugar dissolves. Allow to boil for 5 seconds. Cool completely before adding orange liqueur.
Vanilla Mascarpone Cream
300 grams mascarpone, cold
300 grams thickened cream, cold
30 grams icing sugar
seeds scraped from 1 vanilla pod
To make vanilla mascarpone cream:
Using an electric mixer, whisk mascarpone, cream, icing sugar and vanilla seeds until stiff peaks form but cream is still smooth. Take care not to overwhip the cream.
To assemble:
You will also need about fresh strawberries, sliced.
Brush first cake round with sugar syrup, then generously with strawberry jam, top with sliced strawberries, and spread or pipe mascarpone cream over cake. Brush second cake round with sugar syrup and strawberry jam on both sides, lightly press second cake round over, top with sliced strawberries, then spread or pipe mascarpone cream over cake. Brush last cake round with sugar syrup and strawberry jam on one side, lightly press cake with sugar syrup and jam side down. Cover cake with mascarpone cream. Refridgerate for at least 2 hours before serving.

5.14.2014
Baileys Tiramisu Cake

Everybody needs a pick-me-up every now and then. And nothing says pick-me-up like tiramisu because that is what it means literally.
I’m fussy when comes to making the perfect tiramisu. I never use instant coffee. That is a big no-no in my books although I’ll still be your friend if you do. I always use baileys in my tiramisu, simply because I like baileys better than marsala. I always finely grate chocolate over my tiramisu instead of using cocoa powder because I find that cocoa powder has a dusty taste to it. I always try to avoid raw eggs, using either the eggless version in this case for the mascarpone filling or the zabaglione version which I have done previously.
I use genoise for this tiramisu cake which is perfect for the job in my opinion. For those who are not familiar with genoise, it is similar to victoria sponge cake. However for the genoise, the eggs and sugar are whisk over simmering water until the sugar has dissolves and the mixture reaches between 40C to 45C. This additional step gives a tighter (smaller air pockets) and springy cell structure in the finish sponge. The genoise is meant to be a dry type of cake, much like the victoria sponge cake, made to be moistened and flavoured by soaking syrup.
The genoise is typically made out of 2 parts eggs, 1 part plain flour and 1 part caster sugar by weight, and usually a few grams of butter are added as well. For a thicker sponge like this one, I like to throw in a splash of milk and a few drops of vanilla essence for flavour. I also use cake flour instead of plain flour because it gives the cake a slightly softer texture. But plain flour is perfectly fine. I’m still trying to perfect my technique for genoise. I think genoise is one of those baking fundamentals that is good to master. Anyway, I have written the recipe below, with some tips and notes, the way it has worked for me.


Baileys Tiramisu Cake
Makes one 18cm cake
Genoise
15 grams unsalted butter, cut into 4 pieces
30 grams milk
15 grams vegetable oil
1 teaspoon vanilla extract
180 grams eggs (about 3 large eggs)
100 grams caster sugar
100 grams cake flour, sifted (note: you can use plain flour)
Coffee and Baileys Mixture
125ml cup fresh espresso
60ml baileys
Mascarpone Filling
150ml thickened cream, cold
500 grams mascarpone cheese
60 grams icing sugar
60ml coffee and baileys mixture
You will also need a block of chocolate for grating
To make genoise:
Preheat the oven to 170C (or 150C fan-forced). Line a 15cm diameter round cake pan with a removable base with baking paper.
Warm milk and butter in a small saucepan over medium heat until all the butter has melted and the mixture is warm through (around 50C). Add vegetable oil and vanilla extract, whisk to combine. Set aside.
Combine the eggs and sugar in a bowl set over a saucepan of barely simmering water, whisk continously by hand until the egg mixture reaches between 40C to 45C and the sugar is dissolved. (Note: Test by rubbing a small amount between your finger tips. It should feel completely smooth without sugar grains. The egg mixture at this stage does not need to pale and creamy or increase in volume.)
Transfer egg mixture to the bowl of a stand mixer. Whisk at high speed until the egg mixture has cooled and triple in volume. This will take between 5 to 7 minutes. Reduce speed of mixer to low and continue to whisk for 1 minute to breakup large bubbles and smooth the texture.
Add flour around the edge of the bowl, a third at a time, fold until uniform and smooth, taking care not to deflate the mixture too much. (Note: I find that by adding the flour around the edge of the bowl, it does not deflate the mixture as much as sifting the flour directly over the egg mixture.)
Add roughly about a cup of the batter into the butter and milk mixture, and mix well. Then add the mixture back into the batter and fold gently until combine.
Pour batter into prepared baking pan and bake for about 30 minutes. The cake is done when the top is golden brown and springy to the touch.
Immediately turn the cake out of its tin onto a cooling rack. Place a plastic container over the cake. (Note: This helps the cake to retain the moisture). When cake is cooled completely, slice cake horiontally to get 2 layers.
To make coffee and baileys mixture:
Combine espresso and baileys in a bowl. Set aside.
To make mascarpone filling:
Whisk cream and sifted icing sugar in a bowl with electric mixer until soft peaks form. Add mascarpone and 60ml espresso and baileys mixture, and whisk until combine. Taking care not to overwhip the cream.
To assemble:
Line a 18cm cake pan with baking paper, getting the baking paper as smooth to the side as possible. Centre a cake layer in the prepared cake pan. Brush cake generously with coffee and baileys mixture. Pour about 2/3 of the mascarpone filling over the cake, making sure to spread the filling over the side of the cake. Finely grate chocolate over mascarpone filling. Top with the second cake layer. Brush cake generously with coffee and baileys mixture. Pour remaining mascarpone filling over the cake, and smooth surface. Finely grate chocolate over cake. Refrigerate overnight.

10.23.2013
Chocolate Loaf Cake

This chocolate loaf cake is like a cross between chocolate cake and chocolate brownies. It’s not as fussy as a chocolate cake, or as rich as chocolate brownies. It has just the right amount of chocolate and only slightly sweet to make it an everyday cake, perfect for afternoon tea or even mid-morning snack, with a serve of whipped cream or ice-cream.
I like to bake this cake just slightly on the "undercook" side like how I would with brownies. It helps to keep the cake moist. Check after 35 minutes with a skewer (or similar) insert into the centre of the cake. If the skewer comes out wet, then bake it for 5-10 minutes longer. I took the cake out of the oven when there was still some moist crumbs stuck to the skewer.


Chocolate Loaf Cake
This makes a very small 14x7.5cm loaf. Double quantity for standard size.
90 grams cake flour
20 grams almond meal
10 grams unsweetened cocoa powder
2 grams baking powder
Pinch of salt
120 grams unsalted butter, softened
100 grams caster sugar
2 large eggs, at room temperature
50 grams 70% dark chocolate, chopped, melted and slightly cooled
Preheat oven to 180 degrees celsius (or 160 degrees celsius fan-forced). Line a loaf pan with baking paper.
Combine cake flour, almond meal, cocoa powder, baking powder and salt in a bowl, sift and set aside.
Beat butter and sugar with an electric mixer on high speed until pale and fluffy. Gradually add in eggs, one at a time, on medium speed until fully combined. Add melted chocolate and beat until combined. Using a spatula, fold in the dry ingredients until just combined, taking care not to overmix.
Pour the mixture into the prepared loaf pan, smooth the top with a palette knife, and bake for 40-45 minutes. (Check after 30 minutes with a skewer (or similar) insert into the centre of the cake. If the skewer comes out wet, then bake it for 5 minutes longer. The cake is done if there is some moist crumbs stuck to the skewer.) Allow to cool completely in the cake tin.

|  |
%20)
Imagine this; a coconut cake soaked in lime-lemon syrup and covered in a blanket of fluffy meringue frosting. It's coconut-y and sharply refreshing. Flavours that I find instantly evoke summer.
This is a gorgeous cake. It’s dense (in a good way), moist, and the desiccated coconut gives the cake a nice texture.
The cake is gluten free too, if you use gluten free baking powder which you can find in any supermarket these days. The coconut flour might be a little tricky to find though. I got mine from the health food store.
The meringue frosting is optional. The cake will taste just as good without. Having said that, the toasted meringue frosting plays the perfect accompaniment to the cake. It dresses up the cake and the toasted marshmallow-like meringue frosting is delicious. There are several different methods to making meringue frosting. I like the Italian meringue method which requires pouring hot sugar syrup while beating the egg whites to stiff peak. This method lightly cooks the egg whites. If you are not squeamish about raw eggs, then skip this step, and beat the egg whites with the sugar until stiff peak.
Make the cake the day before to allow time for the cake to soak in the syrup, and make the meringue frosting just before serving. This cake is best serve cold and keeps well in the fridge for several days.
 |  |
 |  |
Lime-Lemon Syrup Coconut Cake with Toasted Meringue Frosting (Gluten Free)
(Adapted from Everyday Gourmet)
Makes 20cm diameter cake
Note: Measuring cups and spoons for this recipe are based on Australian measurements; 1 teaspoon equals 5 ml; 1 tablespoon equals 20 ml; 1 cup equals 250 ml. I have not tested this recipe using volume measurement (i.e. cups and spoons). Therefore if there is any error in the conversion, please let me know.
Coconut Cake
150 grams unsalted butter, chopped and softened
150 grams (3/4 cup) caster sugar
5 eggs, room temperature
140 grams (1 1/4 cups) coconut flour
1 1/2 teaspoons gluten-free baking powder
150 grams (1 3/4 cups) desiccated coconut
430ml (1 3/4 cups) buttermilk, room temperature
Lime-Lemon Syrup
200 grams (1 cup) caster sugar
Zest and juice of 1 lemon
Zest and juice of 1 lime
125ml (1/2 cup) water
Meringue Frosting
100 grams (1/2 cup) caster sugar
40ml (2 tablespoons) water
2 egg whites
Pinch of salt
To make coconut cake:
Preheat the oven to 175 degree celcius (or 160 degree celcius fan-forced). Grease and line a 20cm springform cake tin.
Cream the butter and sugar in a large bowl with electric beaters until pale and fluffy (the sugar needs to dissolve and the mixture should be very creamy). Add the eggs, one at a time, beating well after each addition.
Sift the coconut flour and baking powder into a separate bowl and mix in the desiccated coconut with a whisk. Fold the coconut mixture and the buttermilk into the egg mixture. Pour the batter into the prepared tin and bake for 1 hour, or until firm on top. Cool in the tin on a wire rack while you make the lime-lemon syrup.
To make lime-lemon syrup:
Place all the ingredients in a medium saucepan and bring to the boil, stirring, until the sugar is dissolved. Reduce the heat to medium–low and simmer for 10–15 minutes without stirring.
Pour one third of the syrup over the cake in the tin. After 5 minutes pour over another third of the syrup. If your cake still needs more liquid, after a further 5 minutes, pour over the remaining syrup being careful not to add more than it can absorb. Set the cake aside, refrigerated, for at least 3 hours or overnight.
To make toasted meringue frosting:
Put the sugar into a pan with water and place on a high heat. Bring to the soft-ball stage (115 degree celcius on a sugar thermometer) which will take about 10 minutes.
While waiting for the sugar syrup, start whisking the egg whites with pinch of salt in an electric stand mixer. Whisk until a light froth forms, stopping before any soft peaks can be formed. Once the sugar syrup has reached the soft-ball stage, beat the egg whites at the same time on high speed while pouring the syrup onto them in a thin stream. (Don’t pour the syrup over the whisk, but down the side of the bowl.) Continue to whisk for 10 minutes or until the egg whites are glossy and stiff.
Using a palette knife or spoon, spread the frosting over the cake to create peaks all over the top. Use blowtorch to brown. (Or place under a very hot grill for a couple of minutes. However you won't get the same effect as blowtorch.)


%20)
*SIGH*
My oven is down. And I don't mean that it's depressed. It's broken down, again, the third time in three years. I think this will be my last time trying to fix the stupid oven before I replace it with a new one. Based on the last repairs, I reckon it's going to take about a month and several hundred dollars to have the oven fixed. Such is life in Western Australia where it costs an arm and a leg to get a professional to fix anything if you can actually get anyone to come at all. Argh!
Just as well, since I’ve been thinking about taking a short break from butter, sugar and blogging. So this will be my last post until October (or until the oven is fixed).
Anyway, for this post before I disappear for a while, I thought I will revisit my favourite no-bake cake, Gâteau de Crêpes (aka Mille Crêpe). This cake is still as good as I remembered it. This time, I added thinly sliced strawberries between every fifth layers. I’m always a little surprise by how a few slices of strawberries can impart so much strawberry flavour in a cake.
I contemplated for a while how I should decorate this cake. In the end, I decided to go with rustic. I covered the cake with whipped cream and used the back of a tablespoon to create messy random swirls. I like the element of surprise when slice into what seems like a typical cake to reveal the layers and layers of crepes.
Since I have posted the recipe for the Gâteau de Crêpes once before, I will not repost it. Here’s the link to the recipe if you want to try it out.

8.13.2013
Strawberry Cloud Cake


Okay… I know the word “cloud” is a little bit overused in this food blog of mine. But how else do you describe a cake that is so incredibly light, airy, fluffy and soft.
Strawberries are in season at the moment, and I’m not quite sure how I ended up with more than one kilogram of strawberries last weekend. I think I must have got a bit carried away
Anyway, I thought I will make a strawberry chiffon cake to celebrate the start of the strawberry season. As mentioned here before, and to give a quick recap on tips to make a successful chiffon cake, it is important that you use a non non-stick tube cake pan (aka angel cake pan). Do not line or butter/grease your cake pan. And cool the cake completely, while still in the cake pan, upside down. More details on this blog post.
This is one of my favourite cakes. The strawberry chiffon cake is cottony soft and light, as chiffon cakes should be, with a hint of strawberry flavour. The cake is good on its own. But to boost the strawberry flavour in this cake, I have made it into a two-layer cake, brushed the cake layer generously with the leftover strawberry puree, added slices of fresh strawberries between the layers, and covered the cake with strawberry chantilly cream. This is my idea of strawberry cloud.


Strawberry Cloud Cake
(Strawberry chiffon cake adapted from cookpad.)
Makes 17cm cake
For the strawberry puree
500 grams fresh strawberries
2 tablespoons caster sugar
For the strawberry chiffon cake
4 egg yolks
45 grams caster sugar
30ml vegetable oil
70ml strawberry puree
1 teaspoon vanilla extract
red/pink food colouring (optional)
100 grams cake flour, sifted
5 egg whites
45 grams caster sugar
For the strawberry chantilly cream
500 ml thickened cream (35 percent fat), cold
40 grams caster sugar
2 tablespoons strawberry puree, cold
To make strawberry puree:
Stir together strawberries and sugar. Let stand at room temperature for 30 minutes. Puree the strawberries with the juices in a blender or food processor. Strain the strawberry mixture through a sieve into a bowl, pressing down with the back of a spoon and discarding the solids. Refrigerate until ready to use.
To make strawberry chiffon cake:
Preheat oven to 170 degrees celsius (or 150 degrees celsius fan-forced).
Whisk egg yolks and 45 grams sugar until pale and creamy. Add oil, strawberry puree, vanilla extract and food colouring and whisk to incorporate. Add flour and whisk until smooth. Set aside.
In a clean bowl with a clean and dry whisk (or an electric stand mixer), whisk egg whites until foamy. Add half the remaining sugar and continue beating for a few minutes. Add remaining sugar and beat until egg whites are glossy and stiff peaks form.
Add one-third of meringue into egg yolk mixture and fold in lightly using a spatula. Add remaining meringue and fold to incorporate completely.
Pour batter into tube cake pan and bake for 40-50 minutes. When cake is done, remove from oven and turn it over, leaving it to cool. Once cake has cooled completely, carefully run spatula around the sides of the cake to loosen it before inverting onto a wire rack.
To make strawberry chantilly cream:
Combine cream, sugar and strawberry puree in a clean bowl. Using an electric mixer, whip cream at medium speed until stiff peaks form but cream is still smooth
To assemble:
Split cake into two layers. Brush strawberry puree on one side of cake layers. Spread strawberry chantilly cream onto cake, then top with sliced strawberries. Press second layer of cake over and press down lightly. Cover cake with strawberry chantilly cream. Refridgerate for at least 2 hours before serving.

7.09.2013
Lemon, Ricotta and Almond Flourless Cake

This is a light lemony flourless cake that will be perfect on a beautiful summer/spring afternoon (although it’s winter in Australia now). The cake reminds me a little bit like friands; moist and almondy. I like this cake the next day, after it’s completely chilled, and the flavour and texture seems to get better with time.
This cake is on the sweet side, so I would recommend reducing the sugar (probably down to 200 grams) if you don’t like your cake overly sweet.

Update: I’ve received several requests to provide a volume measurement for this recipe. I’ve been reluctant to do so because I’m one of those bakers who like to methodically measure out each ingredient by weight. I feel that it’s the only reliable way to get a consistent result. But hey, that’s just me. Anyway, I have updated the recipe with volume measurement as requested. I understand that Australian measuring cups and spoons may vary slightly from American. So, just a note that I have provided American cups conversion here. Please let me know if there is any mistake in the conversion.
Lemon, Ricotta and Almond Flourless Cake
(Adapted from Donna Hay Magazine Winter June-July 2013)
120 grams (1 stick) unsalted butter, softened
275 grams (1 1/3 cups) caster sugar
1 vanilla bean, split and seeds scraped
1/4 cup lemon zest
4 eggs, separated and at room temperature
240 grams (2 1/2 cups) almond meal
300 grams (10 1/2 oz) ricotta
Flaked almonds, to decorated
Icing sugar, for dusting
Heat oven to 160 degree celcius fan-force (325 degree fahrenheit fan-forced). Line the base and sides of a 20cm round cake tin with baking paper and set aside.
Place the butter, 165 grams caster sugar, vanilla seeds and lemon zest in an electric mixer and beat for 8-10 minutes or until pale and creamy. Scrap down the sides of the bowl, then gradually add the egg yolks, one at a time, continuing to beat until fully combined. Add the almond meal and beat to combine. Fold ricotta through the almond meal mixture.
Beat the egg whites in a clean bowl with a hand-held electric mixer until soft peaks form. Gradually add the remaining sugar to the egg whites mixture and whisk until stiff peaks form. Gently fold a third of the egg whites into the cake mixture. Repeat with the rest of the egg whites.
Pour the mixture into the prepared cake tin, smooth the tops with a palette knife, decorate the cake with almond flakes, and bake for 40-45 minutes or until cooked and firm to touch. Allow to cool completely in the cake tin. Dust with icing sugar to serve.
Subscribe to:
Posts (Atom)
Social Icons