Small Cakes

1.30.2016
Blueberry and Lemon Friands

I love these simple little cakes. I know they look quite plain, but trust me, they are absolutely delicious. The best thing about them is that they are so easy to make.
In Australia, friands are typically baked in small oval cake tins. You can of course bake these in standard muffin pan.
Now on the topic of brown butter (beurre noisette) vs melted butter. The brown butter apparently gives a nutty note to the cake. I found that it didn’t make a whole heap of difference worthwhile the effort of browning the butter. Well, that’s my opinion anyway. So melted butter for my friands it is.
Of all the different favours I have experimented with, my favourite is still the classic blueberry and lemon. When baked, the blueberries will burst and become jammy and delicious.
These little cakes are best served still warm from the oven, with the crust crisp and the centre moist and light. Having said that, they are just as wonderful after a day or two.


Blueberry and Lemon Friands
Makes about 5
100 grams icing sugar
25 grams plain flour
85 grams almond meal (ground almond)
Zest of 1 lemon
120 grams egg whites (about 3 eggs)
100 grams unsalted butter, melted and cooled
About 85 grams blueberries
About 1/4 cup almond flakes
Additional butter and flour for prepping the cake pan. See method below.
To make Blueberry and Lemon Friands:
Preheat oven to 200 degrees celcius conventional (or 180 degrees celcius fan-forced).
Rub softened butter in the holes of the friand or muffin pan, and dust each hole lightly with flour. Tap the pan, upside down, over the sink to get rid of excess flour. Set aside. (Note: Don't be tempted to skip this step even if you have a non-stick pan. It not only helps to guarantee that the friands won't get stuck in the pan, the butter and flour will give a nice golden crust all over.)
Combine icing sugar, plain flour, almond meal and lemon zest in a large bowl. Set aside.
Lightly whisk egg whites in a separate bowl until they form a light foam. (Note: It's important not to over whisk the egg whites or you will rubbery friands. This step is only for breaking up the egg whites slightly so that it can be folded into the dry ingredients easier.)
Tip egg whites and cooled melted butter into the dry ingredients. Using a spatula, lightly fold the mixture together until just combined.
Divide the batter into the holes of the prepared pan up to 3/4 full. Drop about 6 blueberries in each hole. Lightly crush almond flakes with your fingers and scatter over the cake batter.
Bake for about 25 minutes, or until golden and a skewer inserted into centre of cake comes out clean.
Serve warm with a light dusting of icing sugar.

3.01.2015
Baileys Coffee Mini Cheesecakes

It's been way too long. I know. It's like, what, 3-4 months since my last post? Terrible. I have a million reasons. Too busy, too lazy, not feeling inspired, ate too much during the festive season, my baking is making me fat, trying to go on a sugar free diet (with little success I should add), and blah blah blah.
Anyway, I thought I will share an easy bake before I go MIA (missing in action) for a few months again. Haha. Just kidding. Maybe.
What can I say about these Baileys Coffee Cheesecakes except that they are pretty amazing. They are like Irish coffee, but with Baileys and in mini cheesecakes form. They are so amazing in fact that I actually crawl out of my "blogger's block" so that I can share it with anyone who are still following my blog. That, my friend, is how awesome it is!


Baileys Coffee Mini Cheesecakes
(Adapted from Taste magazine March 2015)
Makes 6 muffin size cheesecakes
120 grams plain chocolate biscuits (I used oreos without the filling)
50 grams unsalted butter, melted
2 tablespoons instant coffee powder
1 tablespoon boiling water
250 grams cream cheese, at room temperature
60 grams brown sugar
2 eggs, room temperature
2 tablespoons baileys
125 grams thickened cream, whipped
Cocoa powder, to dust
To make baileys coffee mini cheesecakes:
Preheat oven to 150C or (130C fan-forced). Line standard muffin/cupcake pan with paper cases. (Tip: Use two paper cases to prevent the cheesecakes from stucking onto the pan.)
Process chocolate biscuits in a food processor until finely crushed. Add butter and process until well combined. (Tip: If you don't have a food processor, just pop the biscuits in a ziplock bag, crush the biscuits with a rolling pin, transfer the crushed biscuits into a bowl and stir in butter until well combined.)
Scoop about 1 heap tablespoon of the biscuit mixture into the paper cases, and press the mixture firmly down to form a base. Bake until set, about 10 minutes. Allow to cool.
Meanwhile, combine the coffee and boiling water in a small bowl until dissolve. Set aside.
Whisk cream cheese and sugar until smooth. Whisk in eggs, one at a time, then add coffee mixture and baileys, and whisk until well combined. (Tip: Press mixture through a sieve into a large bowl to remove any stubborn lumps to get a smooth mixture without overmixing.)
Pour mixture into pan. Set pan in a large roasting pan filled halfway with hot water, bake for 25 minutes or until just set. (Tip: To check, give the pan a little shake, it's done when the mixture is firm around the edges and wobbles a little in the middle.) Remove muffin pan from roasting pan, cool cheesecakes (still in the muffin pan) in the oven with the door slightly ajar. Once cheesecakes are cooled completely, transfer cheesecakes in an airtight container and into the fridge to chill overnight.
Before serving, pipe or spoon a tablespoon of whipped cream over cheesecakes and dust with cocoa powder.

4.22.2014
Very Vanilla Cupcakes

I reckon every baker should have at least one good vanilla cupcake recipe in their repertoire. And I have just the recipe for you. It’s the best vanilla cupcake I’ve made to-date.
The vanilla cake base is adapted from the Cupcake Project. The cake was tested by 50 bakers at the Cupcake Project, and was bestowed the “Ultimate Vanilla Cupcake” title. It's really that good! The cake is soft, moist, fluffy, and most importantly, very vanilla-y. It’s easy to make too, which is a bonus.
I have adapted the recipe slightly. I have reduced the amount of sugar from 225grams to 150grams. I also used vanilla sugar to give the cake extra vanilla oomph. I always have a jar of vanilla caster sugar handy in the kitchen. It’s easy to make vanilla sugar. Don’t discard the vanilla pods after you have scraped off the seeds. Simply bury the used vanilla pods in a jar of caster sugar, and you will be surprise by how much vanilla flavour has infuse into the sugar in just a couple of days.
The fluffy vanilla icing that I used for the cupcakes is my favourite. It tastes like vanilla ice-cream. It’s adapted from Peyton and Byrne British Baking. In my opinion, there’s no better icing than this to complement a vanilla cake this good.
 |  |
 |  |
Very Vanilla Cupcakes
(Vanilla cake adapted from Cupcake Project. Vanilla icing adapted from Peyton and Byrne British Baking.)
Makes 12 cupcakes
Vanilla Cake
seeds scraped from 1 vanilla pod
150 (3/4 cup) caster sugar (I used vanilla caster sugar)
175 grams (1 3/4 cups) cake flour, not self-rising
1 1/2 teaspoons baking powder
1/2 teaspoon baking soda
1/2 teaspoon salt
57 grams (1/4 cup) unsalted butter, soften, cut into small cubes
2 large eggs, room temperature
75 grams (1/3 cup) full-fat sour cream
60ml (1/4 cup) canola oil or vegetable oil
1 tablespoon pure (not imitation) vanilla extract
160ml (2/3 cup) whole milk
Fluffy Vanilla Icing
2 large egg whites (about 80 grams)
100 (1/2 cup) gram caster sugar (I used vanilla caster sugar)
175 gram unsalted butter, soften, cut into small cubes
60 ml (1/4 cup) whole milk, room temperature
1 tsp pure (not imitation) vanilla extract
seeds scraped from 1/2 vanilla pod
To make Vanilla Cake:
Preheat the oven to 175 degrees celsius (160 degrees celsius fan-forced). Line standard cupcake pan with paper cases.
Rub vanilla seeds (scraped from 1 vanilla pod) into caster sugar (or vanilla caster sugar) to break up any lumps and until vanilla seeds are evenly distributed in the sugar.
In a bowl of a stand mixer fitted with the paddle attachment, combine sugar, flour, baking powder, baking soda and salt. Add butter, and beat at low-medium speed until mixture resembles fine crumbs. Stop mixer.
In a seperate bowl, whisk together eggs, sour cream, oil, vanilla extract and milk until smooth.
With the mixer on low speed, slowly pour in the egg mixture to the flour mixture until just combine. This should take only half a minute. It's okay if the batter may still look a little lumpy. Remove the bowl from the mixer, using a rubber spatula, give the batter a quick mix, scrapping down the side and bottom of the bowl. The batter will be runny and may still be a little lumpy.
Pour the batter through a medium-mesh sieve into a large measuring cup or bowl to remove any lumps. Press against the solids in the sieve with a rubber spatula to push through as much batter as possible, then discard the lumps. Divide the batter between the prepared pans. Bake until the tops spring back when lightly pressed and a tester inserted in the centers comes out clean, about 15-20 minutes.
To make Fluffy Vanilla Icing:
Combine the egg whites and caster sugar in a heatproof bowl set over a pan of barely simmering water and whisk continuously by hand until the egg white mixture reaches 70°C on a sugar thermometer. (You can make this icing without a sugar thermometer. Simply whisk until the sugar is dissolved (about 8-10 minutes). Test by rubbing a small amount between your fingertips; it should feel completely smooth, without sugar grains.)
When the sugar has dissolved and the syrup is warm to the touch, remove the bowl from the pan. Using an electric hand-held whisk, whisk for about 10 minutes until stiff peaks form and the mixture has cooled (checked by touching the bottom of the bowl). The meringue needs to be completely cooled before you add the butter.
Start adding small lumps of the softened butter a little at a time, whisking well after each addition and scraping down the bowl from time to time. The icing may appear to curdle and split as you add the butter, but keep going and it will come back together again. Gradually add the milk and the vanilla extract and seeds until everything is well incorporated and the icing is smooth.
To assemble:
Spoon the icing into a piping bag fitted with a star tip and pipe swirls onto the cupcake.

11.13.2013
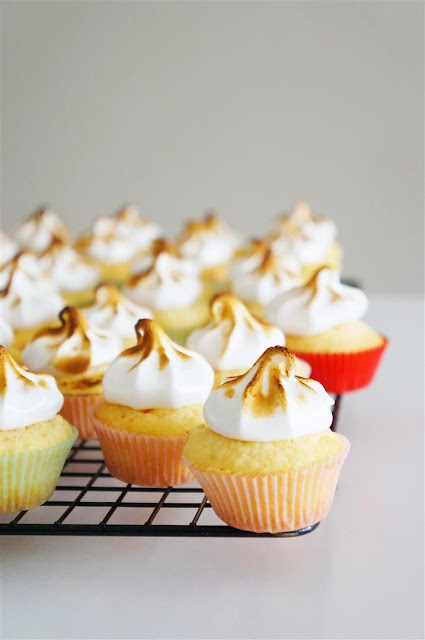
Itsy Bitsy Lemon Meringue Cupcakes

These cute-as-a-button mini lemon meringue cupcakes are super easy to make. I whipped them up within an hour. And they are yummy too!
Well, what can I say, except that we need more recipes like this.
 |  |
 |  |
Itsy Bitsy Lemon Meringue Cupcakes
(Adapted from The Australian Women's Weekly)
Lemon Curd
4 egg yolks
75g caster sugar
80ml lemon juice
40g butter
Lemon Cake
125g butter, softened
2 teaspoons finely grated lemon rind
150g caster sugar
2 eggs
60g desiccated coconut
185g self-raising flour
80ml milk
Meringue
4 egg whites
200 grams caster sugar
1 teaspoon vanilla extract
To make lemon curd:
Combine ingredients in a small heatproof bowl over a pan of simmering water; stir constantly, until mixture thickens slightly. Remove from heat. Cover surface with plastic wrap; refrigerate until cold.
To make lemon cake:
Preheat the oven to 180 degrees celsius (160 degrees celsius fan-forced). Line mini cupcake pan with paper cases.
Beat butter, rind, sugar and eggs in a small bowl with an electric mixer until light and fluffy. Stir in the coconut, then sifted flour and milk. Divide mixture among cases; smooth surface. Bake for about 15-20 minutes or until cooked. Cool cupcakes on wire racks.
Cut a small hole in centre of each cake and fill with lemon curd.
To make meringue:
Combine egg whites and sugar in a small bowl, beat with an electric mixer until thick and glossy. Spoon meringue into a piping bag fitted with a star tip. Pipe meringue on cakes. Bake in preheated oven at 220 degrees celsius (200 degrees celsius fan-forced) until brown lightly, about 5 minutes. (Note: I used blowtorch to brown the meringue)

11.06.2013
Candy Cane Roll Cake
|  |

Christmas holiday is not too far away now. The shops are well stocked with Christmas related things since August. And am I hearing Christmas carols playing ever so subtly in the background the other day?
According to an online survey, most of us start planning for (or at least think about) our Christmas baking/cooking in November. I know I certainly start collecting ideas around this time of the year.
So here's one for Christmas; a delicious candy cane roll cake. It is more interesting than a Christmas log, just as festive, and will make you look like a baking genius. There is nothing too tricky about making this beautiful roll cake except having steady hands to pipe very straight lines.


Candy Cane Roll Cake
(Adapted from Roll Cake by Junko)
Serves 4
For the roll sponge
Part A- egg yolk mixture:
3 egg yolks
30 grams caster sugar
60ml milk
1 teaspoon vanilla extract
40ml vegetable oil
80 grams cake flour
1 teaspoon red food colouring
Part B- meringue:
3 egg whites
30 grams caster sugar
1 teaspoon cornstarch
Sugar syrup
50 grams caster sugar
50 grams water
1 tablespoon cherry liqueur (or kirsch)- Optional
Filling
200ml thickened cream, chilled (Note: do not use low fat cream.)
25 grams caster sugar
1/2 teaspoon vanilla extract
4-5 small strawberries
To make Part A- egg yolk mixture:
Preheat the oven to 170 degrees celsius (or 150 degrees celsius fan-forced). Grease and line a 28cm x 28cm flat square cake pan with baking paper.
Using an electric mixer, beat egg yolks and sugar on medium-high speed until pale and creamy.
Combine milk, vanilla extract and oil in a small bowl. Add to beaten egg yolk mixture and whisk at low speed until just combined. Sift flour over egg mixture, and whisk at low speed until smooth and well-combined.
Divide egg yolk mixture equally into two seperate bowls. Add red food colouring into one portion of the egg yolk mixture, and stir until colour is uniform. Set aside.
To make Part B- meringue:
Combine sugar and cornstarch.
Clean and dry the whisk thoroughly, and in a clean bowl, whisk the egg whites until foamy. Add half the sugar-cornstarch mixture and continue beating for a few minutes, then add remaining sugar-cornstarch mixture and beat until egg whites are glossy and stiff peak form.
Divide meringue equally between the coloured and non-coloured egg yolk mixture prepared earlier. Fold in lightly with a spatula to incorporate completely.
Fill two piping bags fitted with 1cm plain round tips; one with the coloured cake batter, and the other with the non-coloured cake batter. Pipe with the red cake batter first, diagonally on prepared pan, about 3cm-4cm apart. Then fill in-between the piped red cake batter and any gaps with the non-coloured cake batter. Tip: If you are not too confident about getting even spacing, draw lines on the baking paper first, flip baking paper over before you pipe (so that the ink does not touch the batter), then pipe batter along the lines.
Bake for 14 minutes until the cake has risen and feels springy to the touch. Remove from oven. Turn sponge straight from oven onto a sheet of baking paper. Peel off baking paper from the bottom of the sponge. Cover with baking paper, then a tea towel. Set aside to cool completely.
To make sugar syrup:
Combine the sugar and water in a small saucepan and cook over medium heat, stirring, until the sugar dissolves. Allow to boil for 5 seconds. Remove from the heat, let cool, and stir in kirsch.
To make filling:
Combine cream, sugar and vanilla extract in a clean bowl. Using an electric mixer, whip cream at medium speed until stiff peaks form but cream is still smooth.
To assemble:
When the cake is completely cool, make very shallow cuts along the cake, 2 cm apart, in the crust on top of the cake with a small sharp knife. Brush sugar syrup over the cake, followed by the whipped cream and strawberries. Roll up the cake around the filling. Wrap the cake, first in baking paper, then with cling film, refrigerate for at least 1 hour.

4.09.2013
Chunky Chocolate Chocolate Muffins

Sometimes all it takes is something simple to satisfy that nagging chocolate craving. In this occasion, a chocolate muffin studded with generous amount of chunky chocolate bits hit the spot for me. Just 2 tablespoons of oil (can you believe that?) for 24 homemade size muffins and a healthy dose of yogurt to make it special. My favourite part is the crispy crust of the muffin top, and please, it’s not a reference to wearing jeans a size too small.


Chunky Chocolate Chocolate Muffins
(Very loosely adapted for a chocolate smeared old magazine clipping)
Makes 24 (smallish) muffins
375 grams self-raising flour
30 grams cocoa powder
Pinch of salt
220 grams caster sugar
2 eggs
2 tablespoons sunflower oil
140 grams greek yogurt (or natural yogurt)
185ml milk
200 grams dark chocolate, roughly chopped
Preheat the oven to 180 degrees celsius (or 160 degrees celsius fan-forced). Line muffin pans with baking cases.
Mix the flour, cocoa powder, salt and sugar together in a bowl.
In a seperate bowl, mix the eggs, oil, yogurt and milk together. Fold the wet ingredients into the flour mixture until just combined, taking care not to over-mix. (Tip: The trick is to mix as little as you can get away with, without leaving pockets of flour in the batter. The batter should still be slightly lumpy.)
Spoon about 1 tablespoon of batter into the baking cases. Place a few pieces of chopped chocolate over the batter. Gently poke random chopped chocolate into the batter. Fill with batter almost to the top. Place a few pieces of chopped chocolate over the top.
Bake for 25-30 minutes until a skewer inserted in the centre comes out clean. Allow the muffins to cool in the pan for 5-10 minutes, then turn out. Serve the muffins warm.

3.19.2013
Bunny Deco Cake Roll


I brought a book on making Japanese decoration cake roll. The book is in Japanese. And there is a tiny problem… I don’t read Japanese.
I was fully aware that the book is in Japanese when I brought it. I was flipping through the pages in the bookstore, feeling frustrated that I don’t understand a single word. I got it anyway, with a crazy optimism that I will suddenly be able to read Japanese by the time I got home.
Hmm… Maybe not!
Fortunately, there is a step-by-step picture instruction of making the basic decoration cake roll at the back of the book. I also visited the author’s blog (also in Japanese) where she has posted the recipe for one of her decoration cake roll. A quick google translate is enough for me to fill in the blanks. But oh boy, it took me a very long time to interpret and write out this recipe.
Since Easter is just around the corner, I thought I will make a bunny cake roll, which also happens to be the easiest to make compared to all the other decoration cake rolls in the book.
This cake roll not only looks cute, but also the best tasting cake roll that I have made. It is cottony soft, light and melts in my mouth. So if you are not too keen on making the pattern, it’s worthwhile just to make the cake roll.
So there you go, with much hard work and perseverance, the recipe below is my interpretation of making the kawaii bunny deco cake roll. You are welcome.


Bunny Deco Cake Roll
(Adapted from Roll Cake by Junko)
For the roll sponge
Part A- egg yolk mixture:
3 egg yolks
30 grams caster sugar
60ml milk
1 teaspoon vanilla extract
40ml vegetable oil
80 grams cake flour
Part B- meringue:
3 egg whites
30 grams caster sugar
1 teaspoon cornstarch
For the eyes, nose and snout
1 egg white
1/4 teaspoon cake flour
black food colouring
brown food colouring
For the sugar syrup
10 grams caster sugar
20ml hot water
For the filling
150ml whipping cream, chilled (Note: do not use low fat cream.)
18 grams caster sugar
1/2 teaspoon vanilla extract
Fresh fruits of your choice (I used mango)
For the ears
White chocolate (I used Nestle White Chocolate Melts)
Pink food colouring
To make Part A- egg yolk mixture:
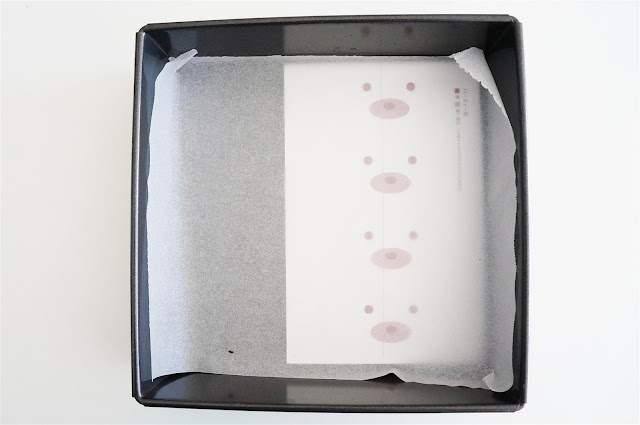
Preheat the oven to 170 degrees celsius (or 150 degrees celsius fan-forced). Grease and line a 28cm x 28cm flat square cake pan with baking paper.
Using an electric mixer, beat egg yolks and sugar on medium-high speed until pale and creamy.
Combine milk, vanilla extract and oil in a small bowl. Add to beaten egg yolk mixture and whisk at low speed until just combined. Sift flour over egg mixture, and whisk at low speed until smooth and well-combined.
To make eyes, nose and snout:
Clean and dry the whisk thoroughly, and in a clean bowl, whisk the egg whites until stiff peaks form.
For the eyes and nose:
Scoop out 1/2 tablespoon egg yolk mixture from Part A into a small bowl. Stir in black food colouring. Stir in 1 tablespoon of whisked egg whites until well-combined.
For the snout (brown part of the nose):
Scoop out 1 tablespoon egg yolk mixture from Part A into a small bowl. Stir in 1/4 teaspoon of cake flour. Stir in brown food colouring. Stir in 2 tablespoons of whisked egg whites until well-combined.
On the prepared cake pan, pipe eyes and nose. Bake for 1 minute. Remove from oven.
Pipe snout over nose. Bake for 1 minute. Remove from oven.
(Note: reserve leftover whisked egg whites for Part B.)
To make Part B- meringue:
Combine sugar and cornstarch.
Clean and dry the whisk thoroughly, and in a clean bowl, whisk the egg whites until foamy. Add half the sugar-cornstarch mixture and continue beating for a few minutes, then add remaining sugar-cornstarch mixture and beat until egg whites are glossy and stiff peak form.
Add one-third of meringue into egg yolk mixture from Part A. Fold in lightly with a spatula to loosen the mixture a little. Then add the rest of the meringue (including leftover whisked egg whites from making the eyes and nose) and fold to incorporate completely.
Pour batter into the prepared pan over the "eyes and nose", spreading the mixture evenly and smoothing the top with a spatula. Lightly tap the bottom of the tray on the work surface.
Bake for 14 minutes until the cake has risen slightly and feels springy to the touch. Remove from oven. Turn sponge straight from oven onto a sheet of baking paper. Peel off baking paper from the bottom of the sponge. Cover with baking paper, then a damp tea towel. Set aside to cool completely.
To make sugar syrup
Dissolve sugar in hot water. Set aside to cool.
To make filling:
Combine cream, sugar and vanilla extract in a clean bowl. Place bowl over a larger bowl filled with ice cubes and water. Using an electric mixer, whip cream at medium speed until stiff peaks form but cream is still smooth.
To make bunny ears:
Melt white chocolate as directed on package. Place 1 tablespoon of melted white candy into a small bowl and tint pink. Place both white and pink candy into seperate ziplock bag. Snip off small tip from one corner of each bag. Draw 8 bunny ears (plus a couple spares) on baking paper with melted chocolate. Fill in middle of white ears with pink chocolate. Allow to set at room temperature.
To assemble:
When the cake is completely cool, make shallow cuts along the cake, 2 cm apart, in the crust on top of the cake with a small sharp knife. Brush sugar syrup over the cake, followed by the whipped cream and fresh fruits. Roll up the cake around the filling. Wrap the cake in fresh clingfilm and refrigerate for at least 1 hour. Decorate with rabbit ears.

2.26.2013
Matcha (Green Tea) Madeleines
%20Madeleines.%20By%20Cakelets%20and%20Doilies.)
Madeleines are definitely one of the easiest things I have baked. I love that madeleines are made up of basic ingredients that I always have in my pantry. They are also incredibly versatile, which means that I can get creative with the flavours.
Unfortunately, you will need a madeleine mould/pan to make madeleines. I imagine you can probably use mini muffin/cupcake pan. However what you get will no longer be madeleines, but humpback sponge cakes. I honestly believe that madeleines not only look better, but also taste better in seashell shape.
Madeleines are best eaten on the day they are made because they do get stale the next day. I like the madeleines best straight out of the oven, while the inside is moist and the exterior crisp. Having said that, they are equally tasty the next day dip in a cup of coffee.

Matcha (Green Tea) Madeleines
(Adapted from we love madeleines)
Makes 18 standard size madeleines
55 grams unsalted butter, melted and cooled, plus more for greasing the pans
80 grams all purpose flour, plus more for dusting the pans
2 teaspoons matcha
2 eggs, at room temperature
65 grams caster sugar
pinch of salt
1/2 teaspoon vanilla extract
In a small bowl, sift together the flour and matcha and set aside.
In an electric mixer (or in a medium bowl with a handheld mixer) on high speed, beat the eggs with the sugar, salt and vanilla extract for about 5 minutes, or until the mixture forms ribbons and roughly doubles in volume. Use a rubber spatula, gradually fold the flour mixture into the egg mixture until incorporated. Drizzle in the melted butter and gently fold into the batter. Cover the bowl with plastic wrap and refrigerate for at least 1 hour or up to 24 hours.
Preheat the oven to 200 degrees celsius (or 180 degrees celsius fan-forced). Grease madeleine pan with melted butter and dust with flour, tapping out any excess.
Spoon or pipe the batter into the prepared pan, filling each mold about three-quarters full. Bake until golden brown around the edges, about 10 minutes. (Tip: Don't overbake or the madeleines will be dry.)
Immediately turn out the madeleines onto a wire rack and let cool.

11.13.2012
Ferrero Rocher Inspired Mini Cupcakes

While in the shops the other day, I noticed that there were more than usual amount of Ferrero Rocher stacked up on the shelves. A sign that Christmas is approaching. I went home feeling inspired to make cupcakes that taste like Ferrero Rocher, and I happen to have the perfect cake and frosting recipes for that.
These mini-cupcakes are made up of a delicious chocolate cake base topped with a creamy Nutella frosting. In each cupcake hides a little surprise (the best bit)- a teaspoon of Nutella and a whole roasted hazelnut.
I have deliberately made these cupcakes bite size. Not because I tend to prefer mini-cupcakes over the full size ones, and that mini-cupcakes are so much cuter. But with the mini-cupcakes, we will be able to get all the flavours and textures of the chocolate cake, frosting, nutella and hazelnut together with just one bite. It is really like eating a cake version of the Ferrero Rocher.
The chocolate cake is adapted from Miette’s double chocolate cake. I love this chocolate cake as much as the perfect chocolate cake that I blogged about several weeks ago. This chocolate cake is just as moist and soft, and most importantly, very chocolaty. However, it’s not as easy to prepare and involves a couple more dirty bowls. But please don’t let this put you off because it is a really good chocolate cake and well worth the effort.
I got the recipe for the nutella frosting from Sweetapolita. This frosting is so creamy, fluffy and nutella-y (I make that word up. But you got what I mean right?). I literally had to stop myself from pipping the frosting straight into my mouth. It's so good.

Ferrero Rocher Inspired Mini Cupcakes
(Chocolate cupcakes adapted from Miette's double chocolate cake,
Nutella frosting from Sweetapolita)
Makes about 48 mini cupcakes
For the chocolate cupcakes
185 grams all-purpose flour
110 grams natural unsweetened cocoa powder (not dutch process)
6 grams of baking soda
2 grams of baking powder
Pinch of salt
55 grams 70% dark chocolate, coarsely chopped
1 cup (250ml) of boiling water
1 cup (250ml) of buttermilk
1/2 teaspoon of vanilla extract
2 large eggs, at room temperature
1/2 cup (125ml) of vegetable oil
300 grams of caster sugar
For the nutella frosting
225 grams unsalted butter, softened but cool
190 grams icing sugar, sifted
2 teaspoons (10 ml) pure vanilla extract
125 grams 70% dark chocolate, chopped, melted and slightly cooled
100 grams Nutella
1 tablespoon (15 ml) milk
pinch of salt
You will also need 48 teaspoons of nutella and 48 whole hazelnuts.
To make chocolate cupcakes:
Preheat the oven to 180 degrees celsius (or 160 degrees celsius fan-forced). Line mini-cupcakes/mufin pans with baking cases.
Sift together the flour, cocoa powder, baking soda, baking powder, and salt into a bowl and set aside.
Put the chocolate in a heatproof bowl and pour the boiling water over it. Whisk until the chocolate is melted. Let the mixture cool for 15 minutes.
In a separate bowl, whisk together the buttermilk and vanilla. Set aside.
In the bowl of a stand mixer fitted with the whisk attachment, whisk the eggs on high speed (I use #6 on my KitchenAid mixer) until foamy, about 2 minutes. Reduce the speed to low (#2 on KitchenAid mixer) and slowly in the oil, whisking until combined, about 30 seconds. Raise the speed to medium (#4 on KitchenAid mixer) and whisk until fully incorporated, about 30 seconds longer.
Reduce the speed to low and slowly pour the cooled chocolate mixture into the egg mixture. Slowly pour in the buttermilk and vanilla mixture. Add the sugar and whisk until the batter is smooth and liquid, about 2 minutes.
Stop the mixer. Remove the bowl and add the sifted dry ingredients and mix until just incorporated, preferably by hand, lifting and folding in from the bottom center. Using a rubber spatula, scrape down the sides of the bowl and mix again just briefly by hand. The batter may still look a little lumpy, but stop mixing.
Pour the batter through a medium-mesh sieve into a large measuring cup or bowl to remove any lumps. Press against the solids in the sieve with a rubber spatula to push through as much batter as possible, then discard the lumps. Divide the batter between the prepared pans. Bake until the tops spring back when lightly pressed and a tester inserted in the centers comes out clean, about 15-20 minutes.
To make nutella frosting:
In a bowl of stand mixer fitted with paddle attachment, combine the icing sugar and butter and beat on low speed (#2 on KitchenAid mixer) for about 1 minute.
Add vanilla, and beat on low speed until well combined. Add the melted and slightly cooled chocolate and beat on medium speed (#4 on KitchenAid mixer) until smooth, about 2 minutes).
Add the Nutella, milk and pinch of salt, and beat on med-high speed for another minute.
To assemble:
Cut a hole in centre of each cake, fill with 1 teaspoon of nutella, and gently push in a hazelnut into the nutella.
Spoon the frosting into a piping bag fitted with a star tip and pipe swirls onto the cupcake.

8.21.2012
Lamington Roll

What do you get when you combine lamington and swiss roll? Lamington roll, of course. Ingenius! And I love it!
Just imagine this- light sponge roll filled with sweet berry jam and luscious cream, rolled in chocolate icing, and covered with shredded coconut. Hmmmm... perfect!
Do spread a thick generous layer of cream over the cake as I found that the cream seems to “disappear” into the cake after a while. It will be messy when you pour the chocolate icing over the cake and roll it over the shredded coconut. But the lamington roll will be so good that you will easily forgive and forget the mess.
Lamington Roll
(Adapted from Taste)
Sponge Roll
3 eggs
100 grams caster sugar
100 grams self-raising flour
1 tablespoon cornflour
1 cup (250ml) thickened cream
1 tablespoon icing sugar mixture
1/4 cup (90g) raspberry jam
100 grams shredded coconut (I used desiccated coconut)
Chocolate Icing
230 grams icing sugar mixture
50 grams cocoa powder
20 grams butter
1/3 cup (80ml) milk
To make sponge roll:
Preheat oven to 180 degree celcius fan force. Line a 25x30cm swiss roll pan with baking paper, allowing the sides to overhang.
Use an electric mixer to whisk eggs until thick and pale. Add sugar, 1 tablespoon at a time, and continue whisking until sugar dissolves. Sift flour and cornflour over egg mixture and gently fold until just combined. Pour into prepared pan and smooth surface. Bake for 10 minutes or until sponge is dry to the touch. Place a sheet of baking paper on a clean surface
Use an electric mixer to whisk the cream and icing sugar mixture together until firm peaks form.
Unwrap the sponge and spread evenly with jam. Top with the cream, leaving a 3cm border. Re-roll sponge, using the paper as a guide, to enclose the filling. Place on a wire rack over an oven tray.
To make the chocolate icing:
Combine the icing sugar, cocoa powder, butter and milk in a heatproof bowl. Place over a saucepan half-filled with simmering water and stir for 3-4 minutes or until icing is smooth and runny. Remove from heat and carefully spoon evenly over the sponge roll. Place the coconut on a large tray. Roll the sponge into the coconut to coat. Set aside for 30 minutes to set. Cut into slices to serve.
Subscribe to:
Posts (Atom)
Social Icons